Using Git to freely experiment and never lose work
What Git is
Git is an extremely powerful version-control system created by Linus Torvalds in 2005 for development of the Linux kernel, which is one of the largest open-source software projects in existence. It makes it possible for large numbers of contributors to work on various features, all within a single codebase (which could be comprised of hundreds or thousands of files).
Bitbucket, GitLab, and especially GitHub (all private companies) rode the rise of Git (the protocol) to become the center of the software development universe. All of these companies basically offer cloud-based storage for codebases using Git for version-control (we refer to these codebases as repositories), as well as a web-based interface for collaborating on them — following, commenting, etc.
Why we care
In this course, we’re going to use one simple but effective Git-based workflow to save versions of our work. This will allow us to freely experiment with different approaches, while never having to throw away code.
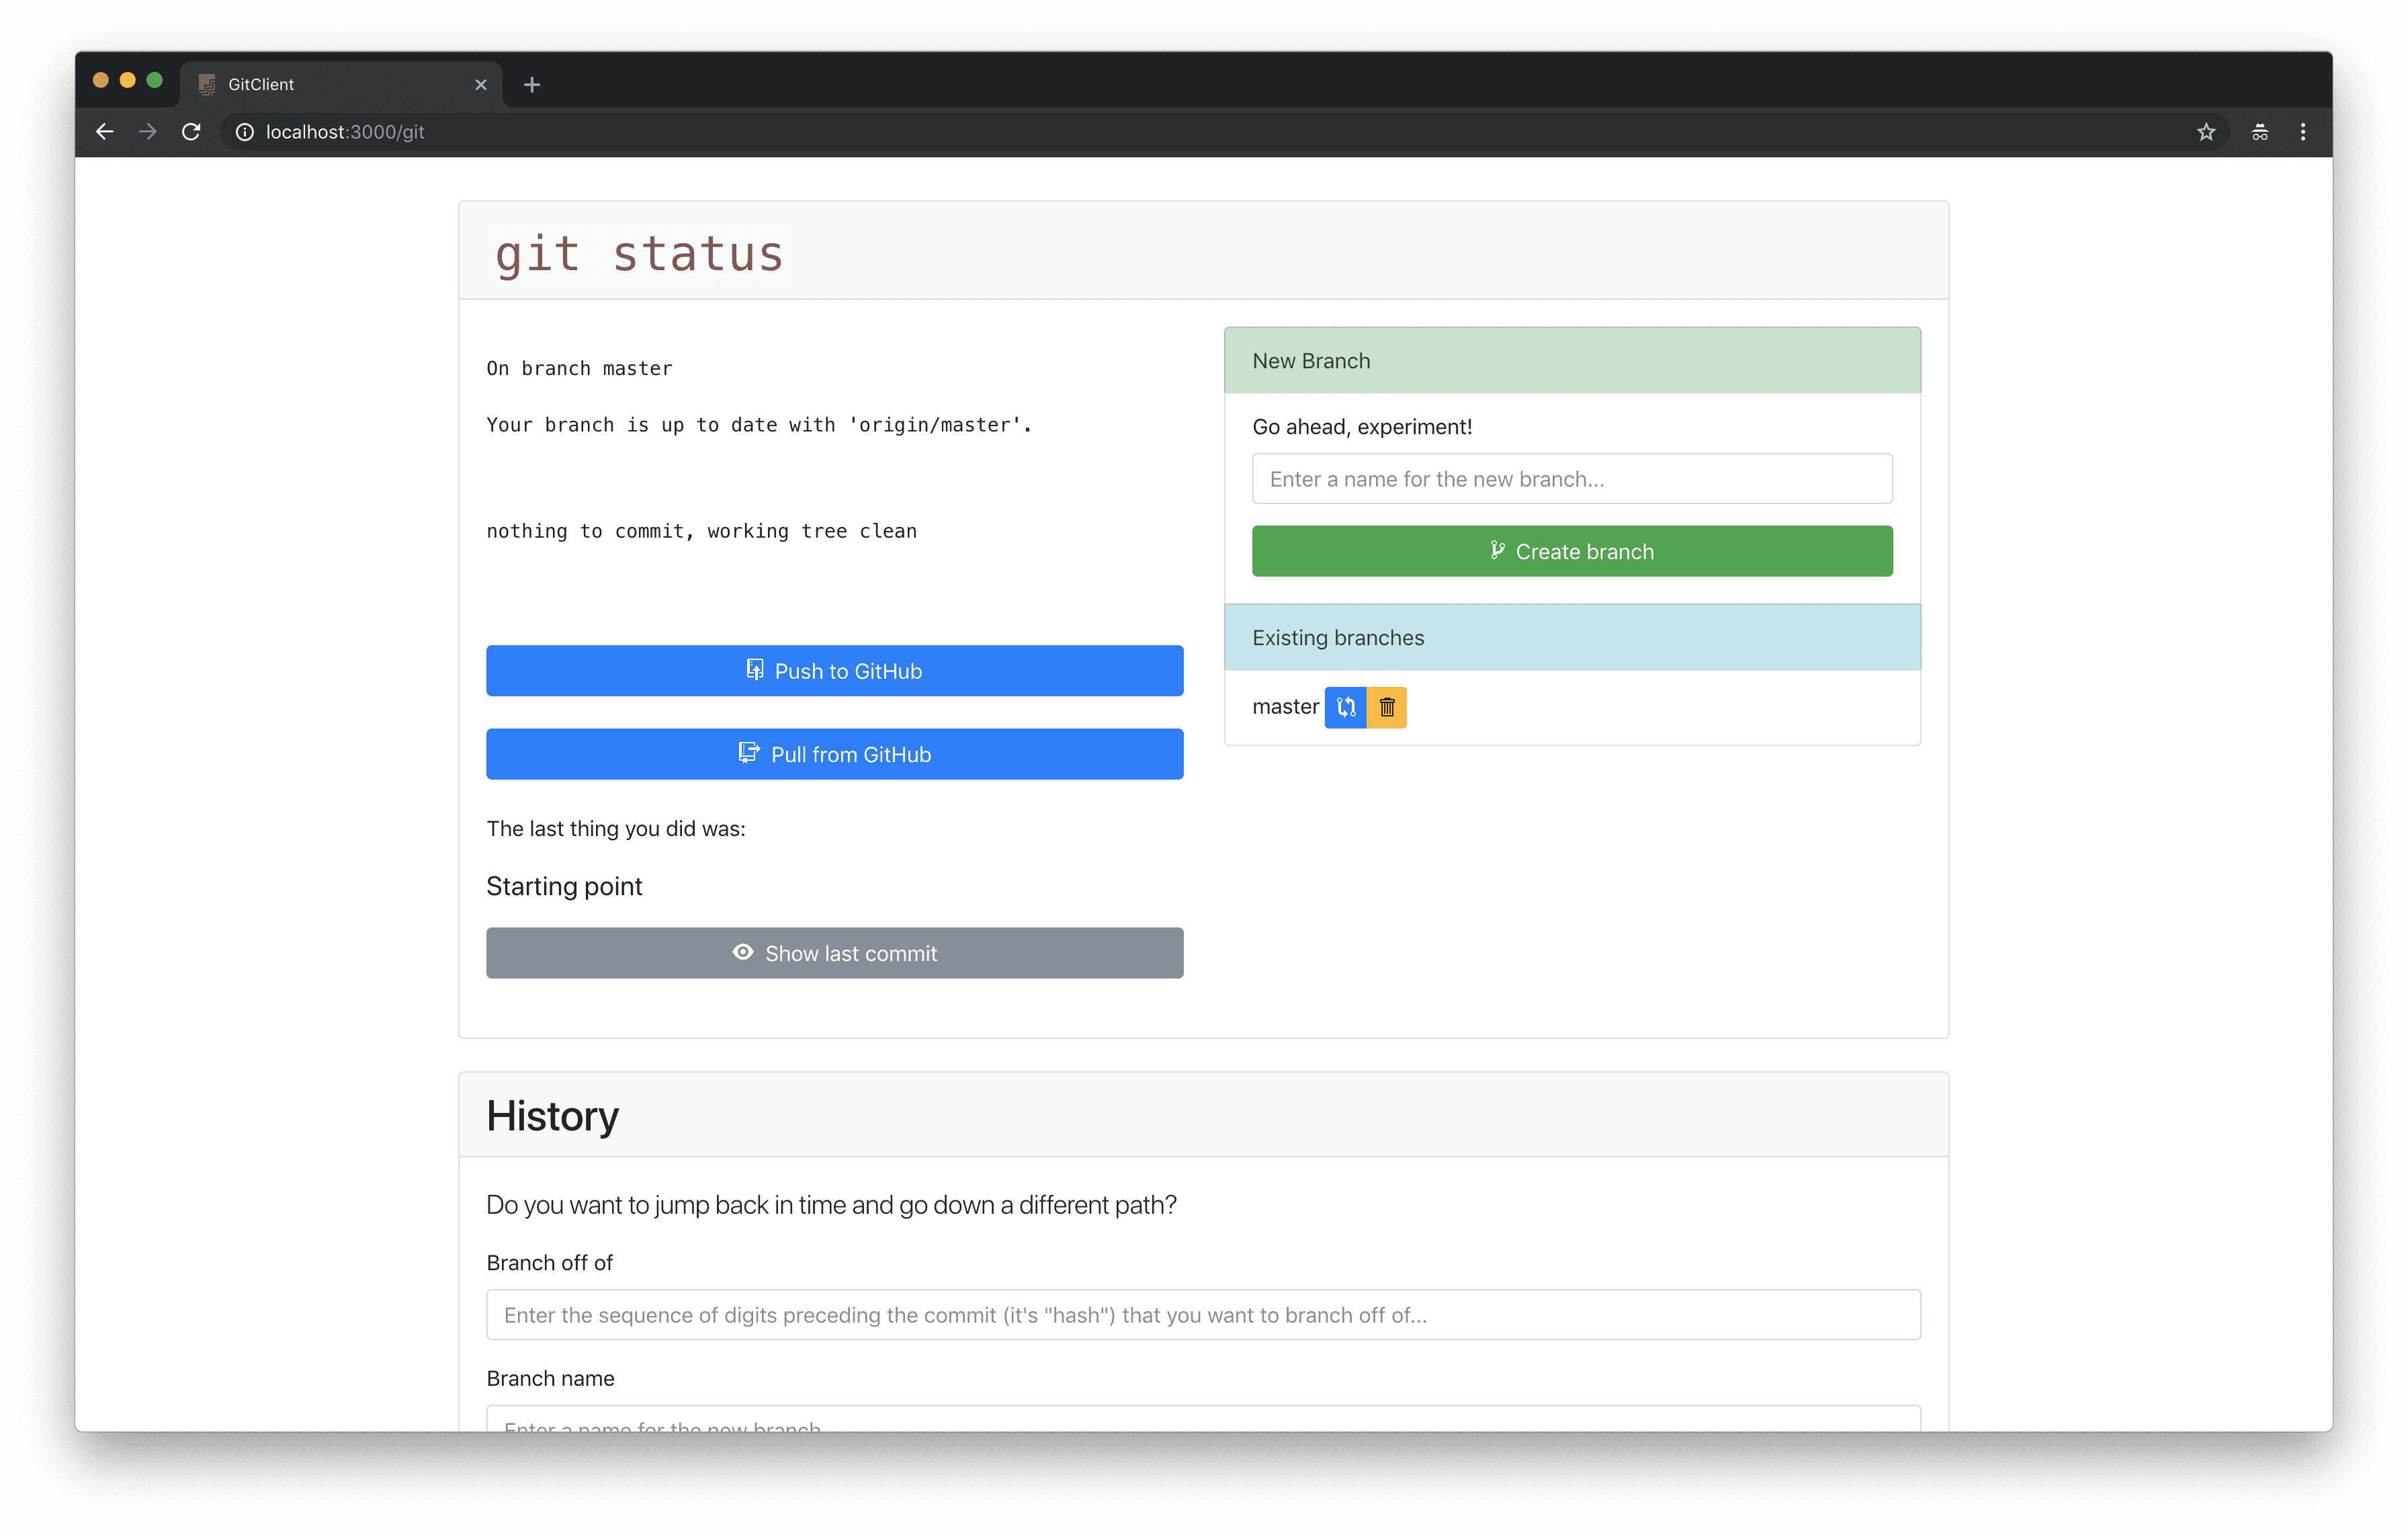
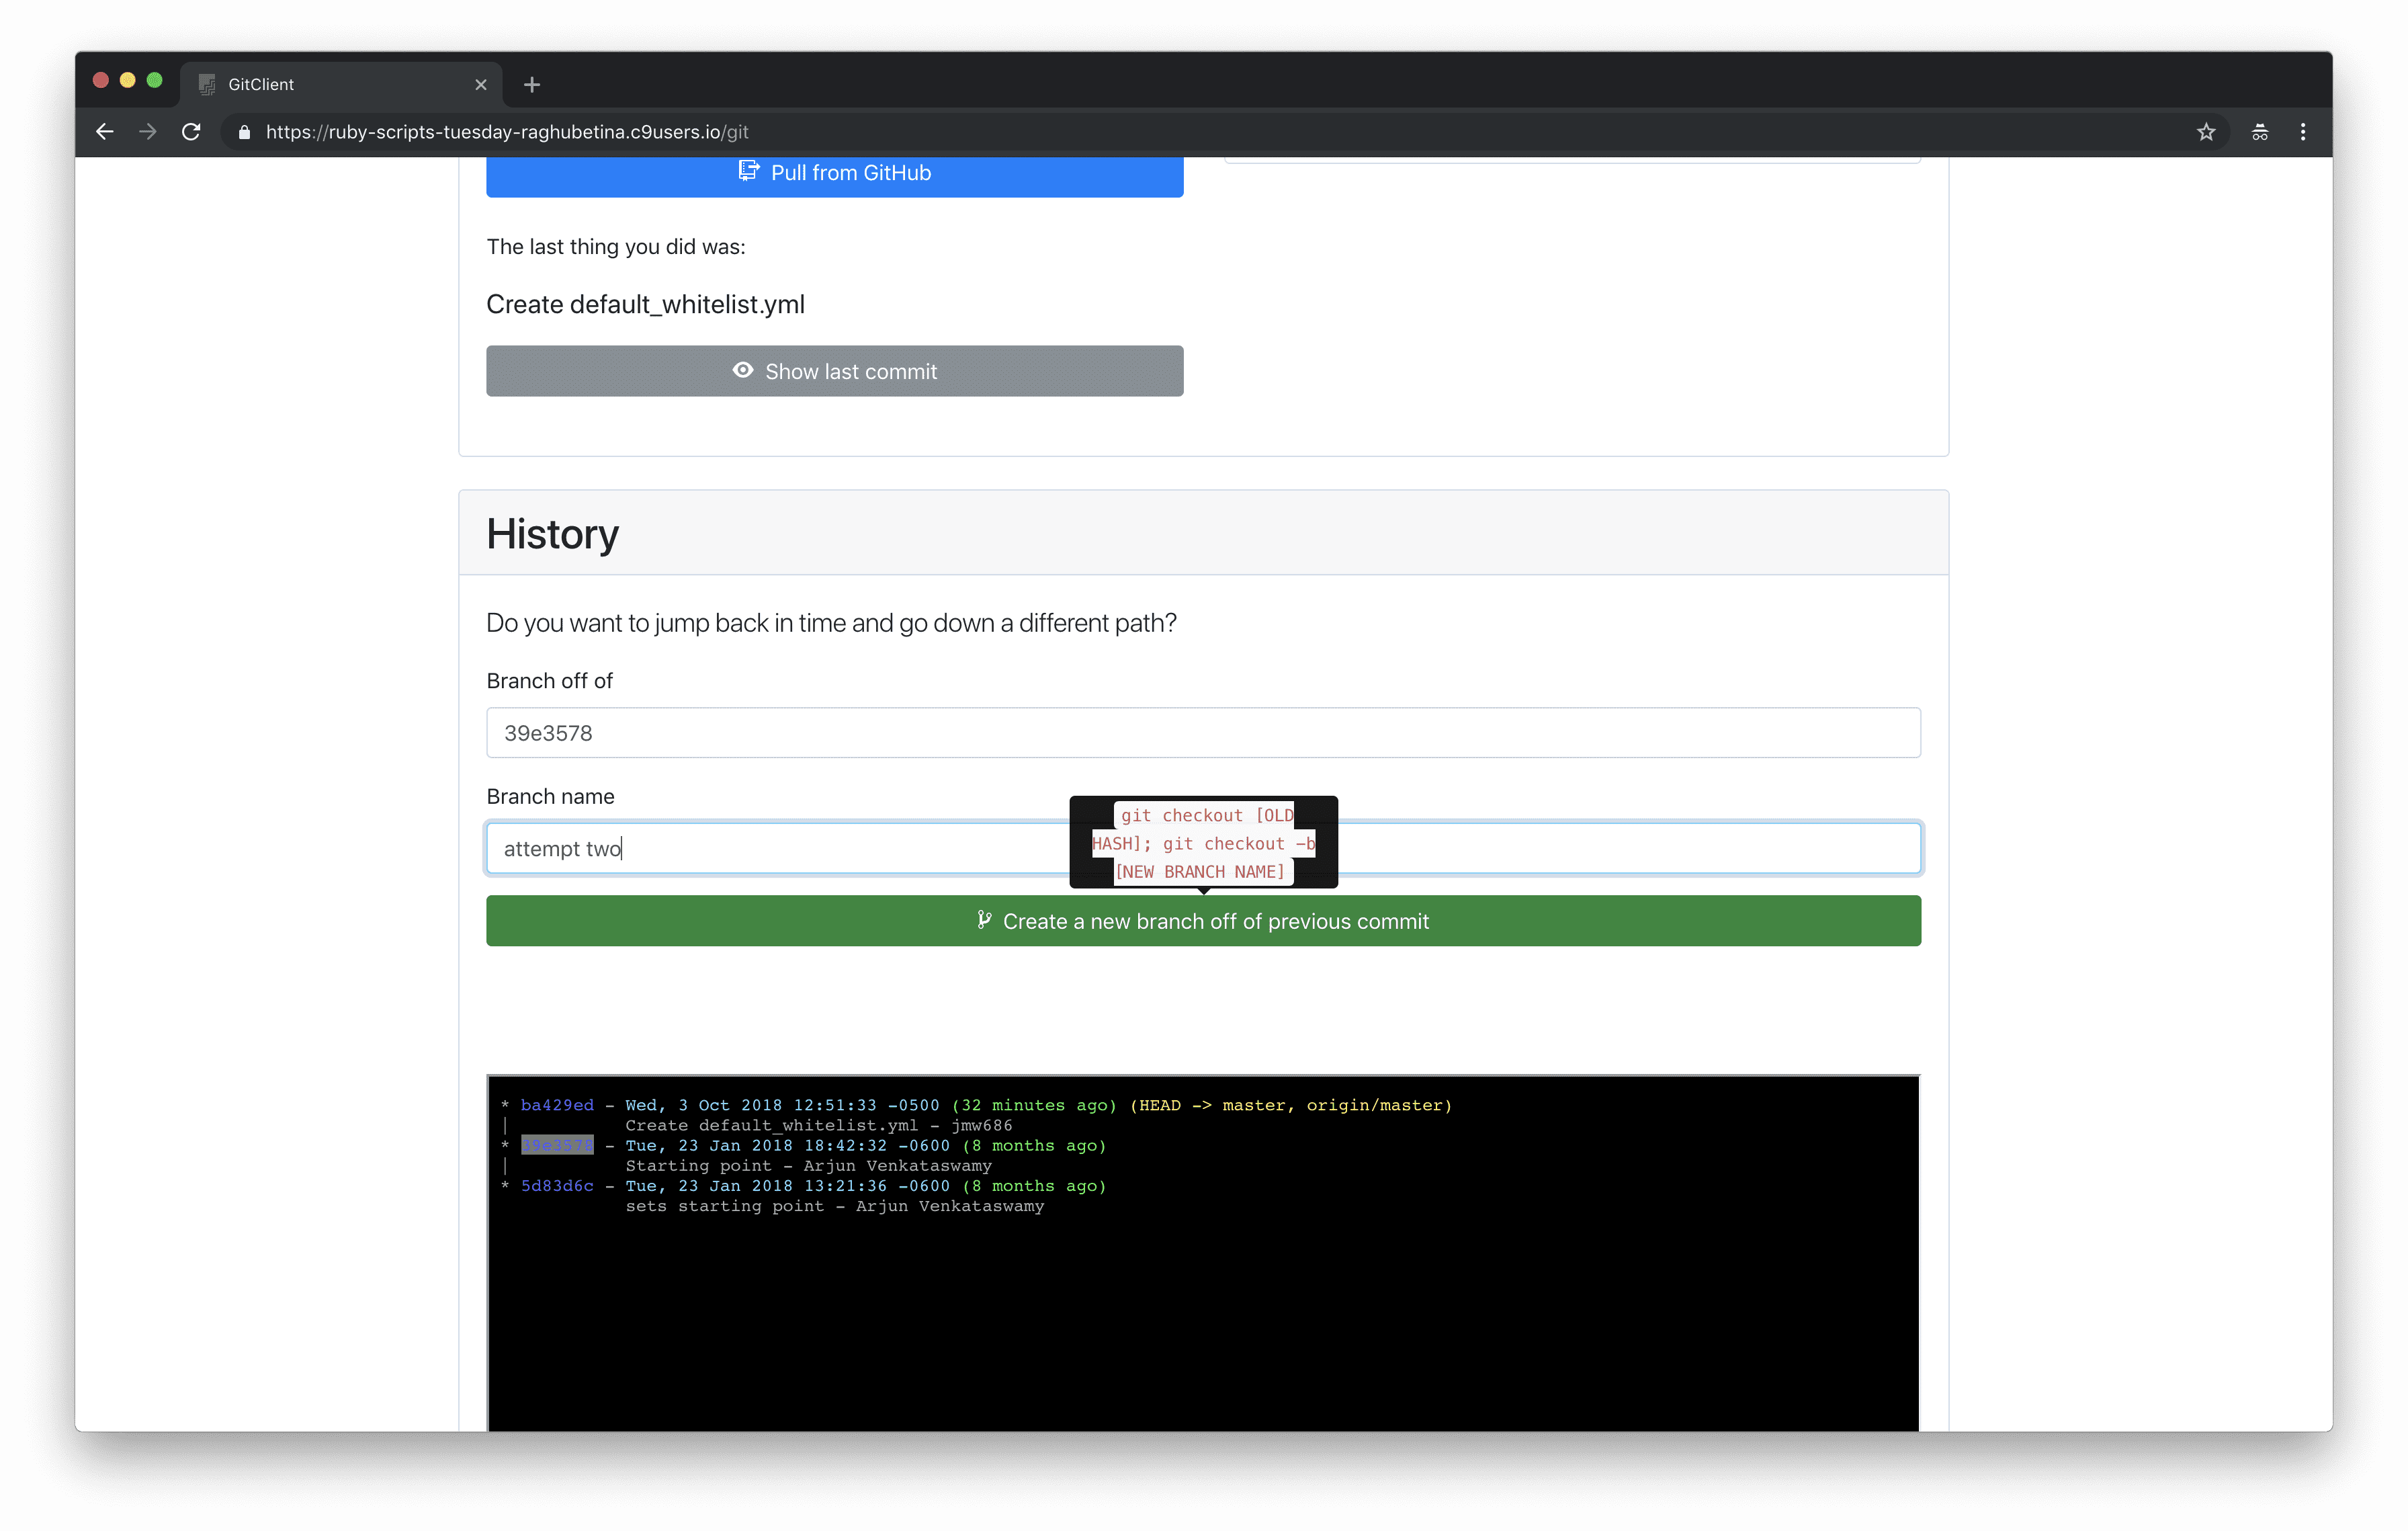
In all of our Rails apps, after you start the server, you can navigate to the address /git in your live application. If you’re using Gitpod, the URL will look like:
https://[YOUR GITPOD WORKSPACE URL].gitpod.io/git
That will open a page that looks like this:
As soon as you make any changes to any of the code in the project, and refresh this page, the lines that you changed will appear:
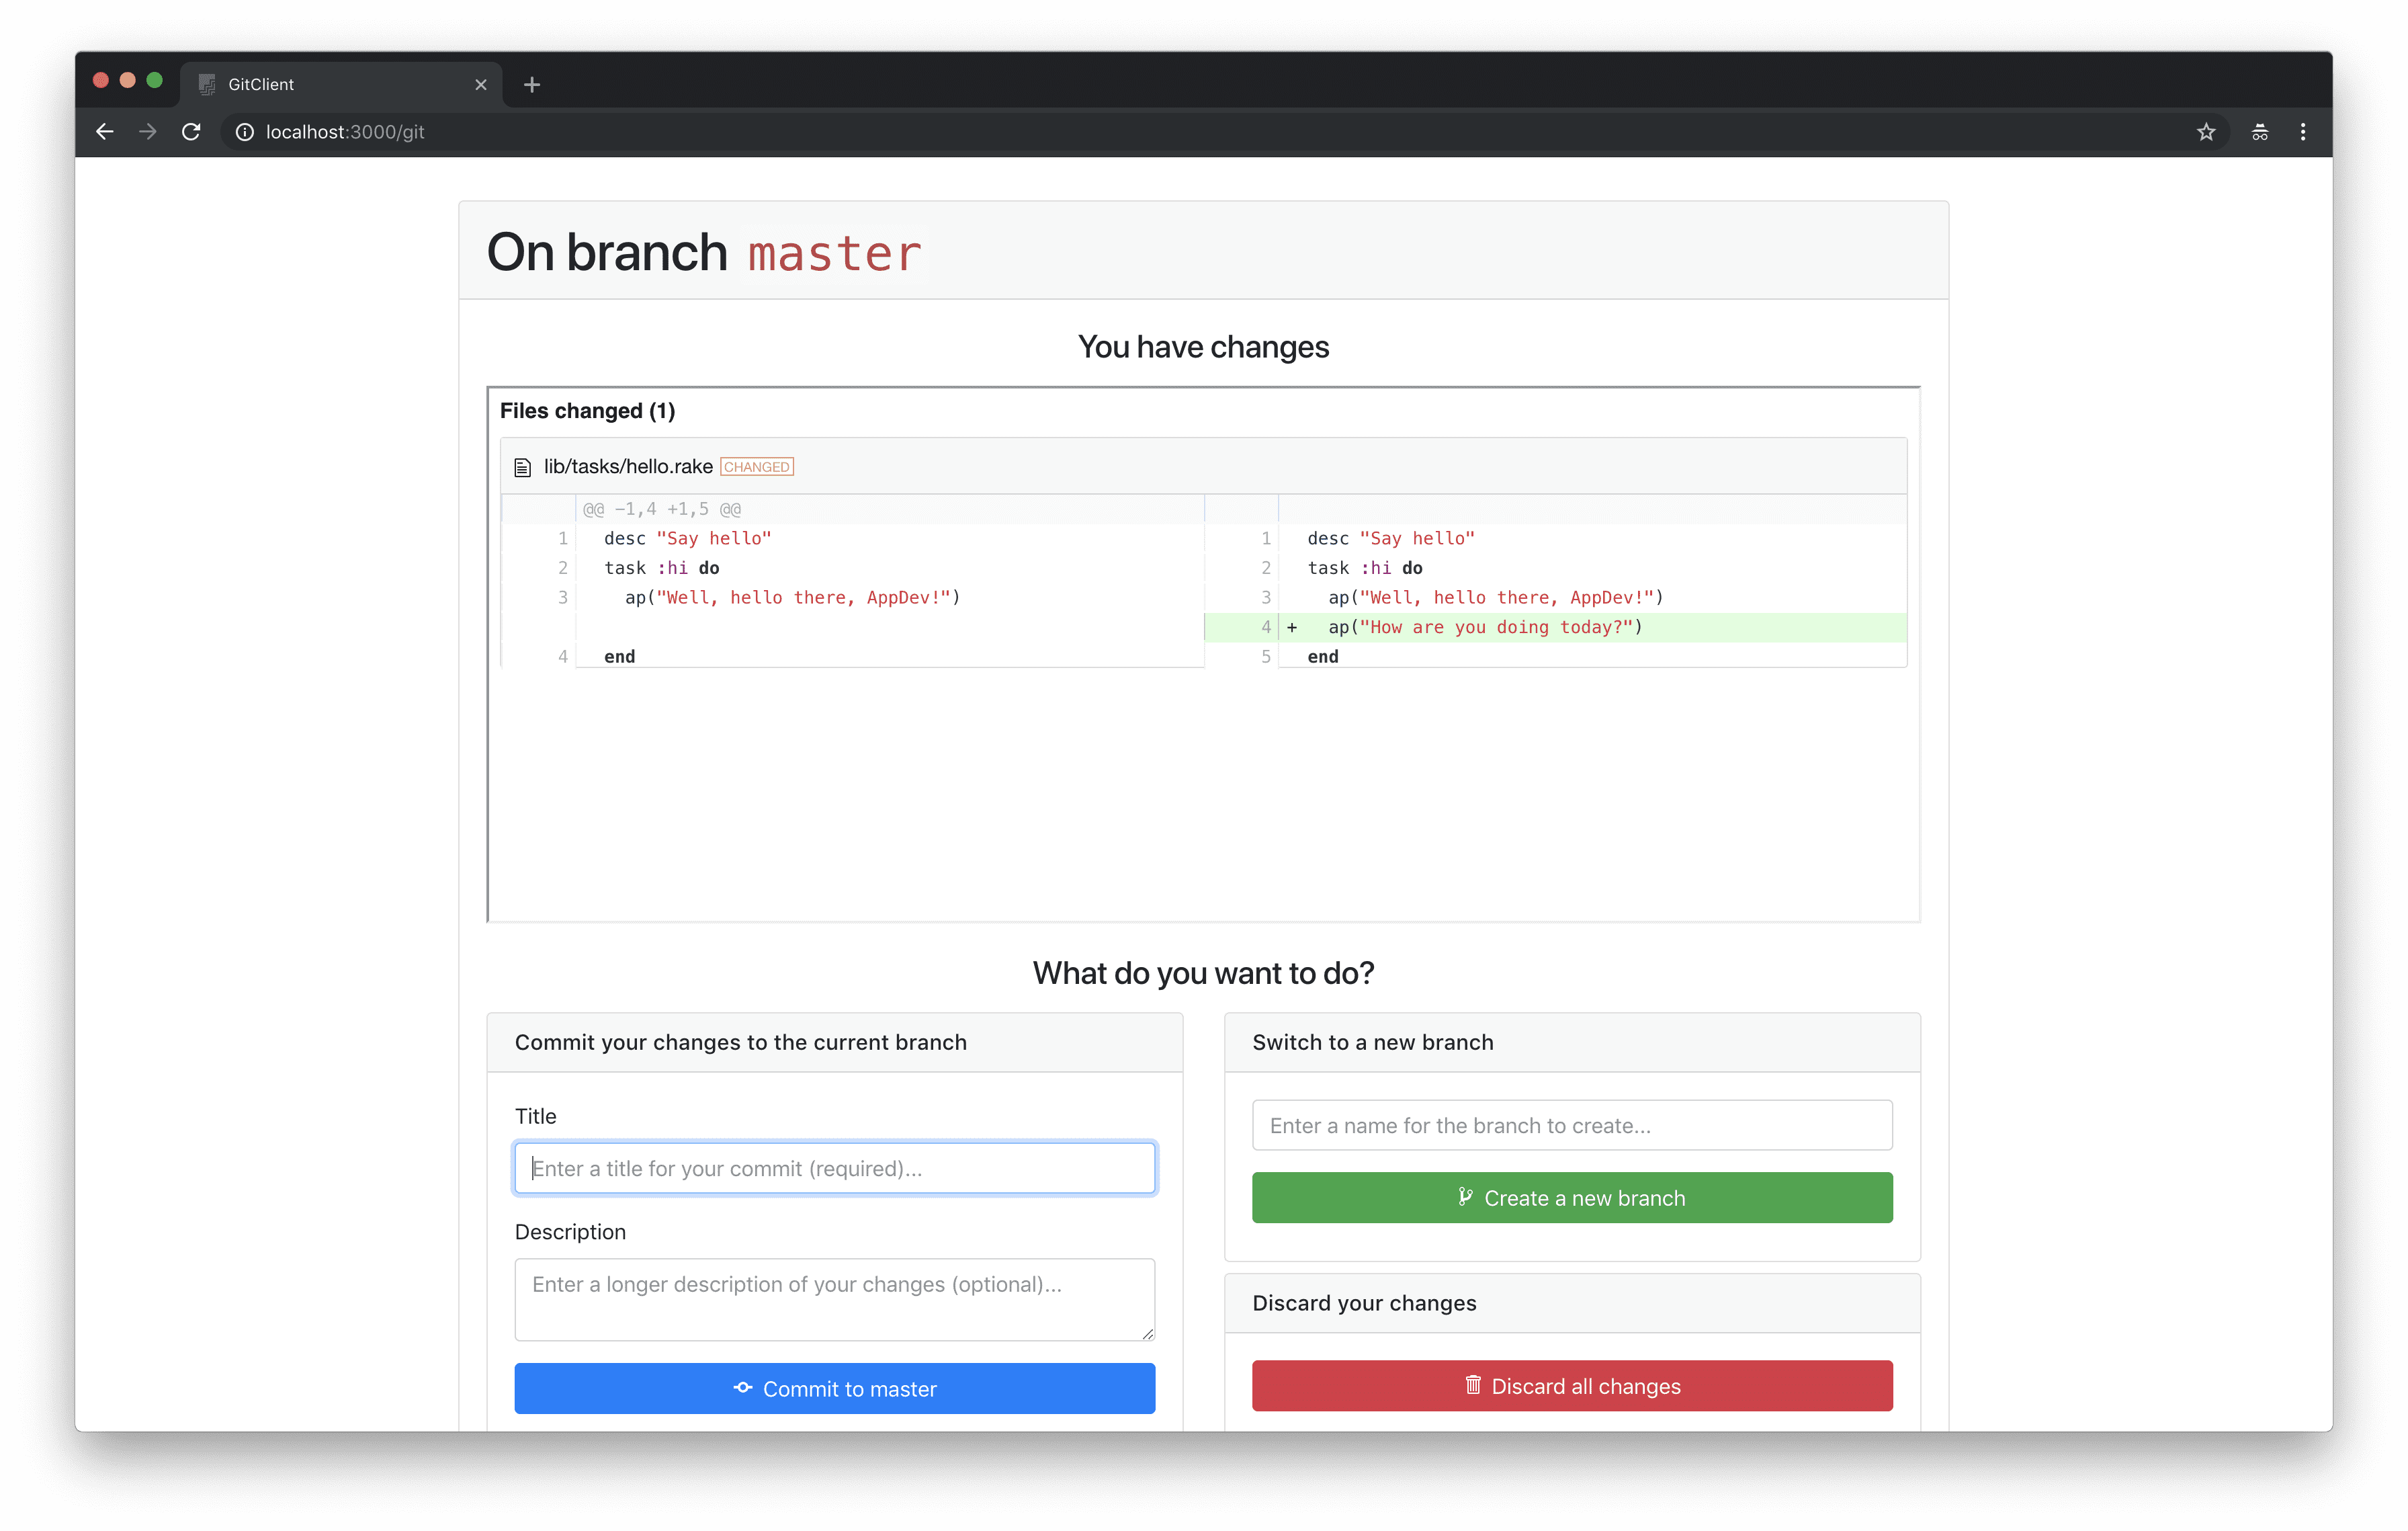
On the left, you see the code as it was previously; on the right, you see the new code. Lines added are highlighted in green, lines removed are highlighted in red.
Below, there are two things you can do: commit your changes on the left, and switch to a new branch on the right. When you hear the word “commit”, think “snapshot”. When you hear the word “branch”, think “version”.
A Git commit is a snapshot of all of the folders and files in your project at a particular time. Since our files of code are all interdependent, it doesn’t make sense to save versions of individual files — we need to know the entire state of the project for a version to be useful.
Each branch (“version”) is a series of commits (“snapshots”).
The most important thing for you to remember is simple: commit early and commit often. As long as you are taking snapshots of your work at various points, it will always be easy to get back to a previous state in case you want to start over and explore a different approach.
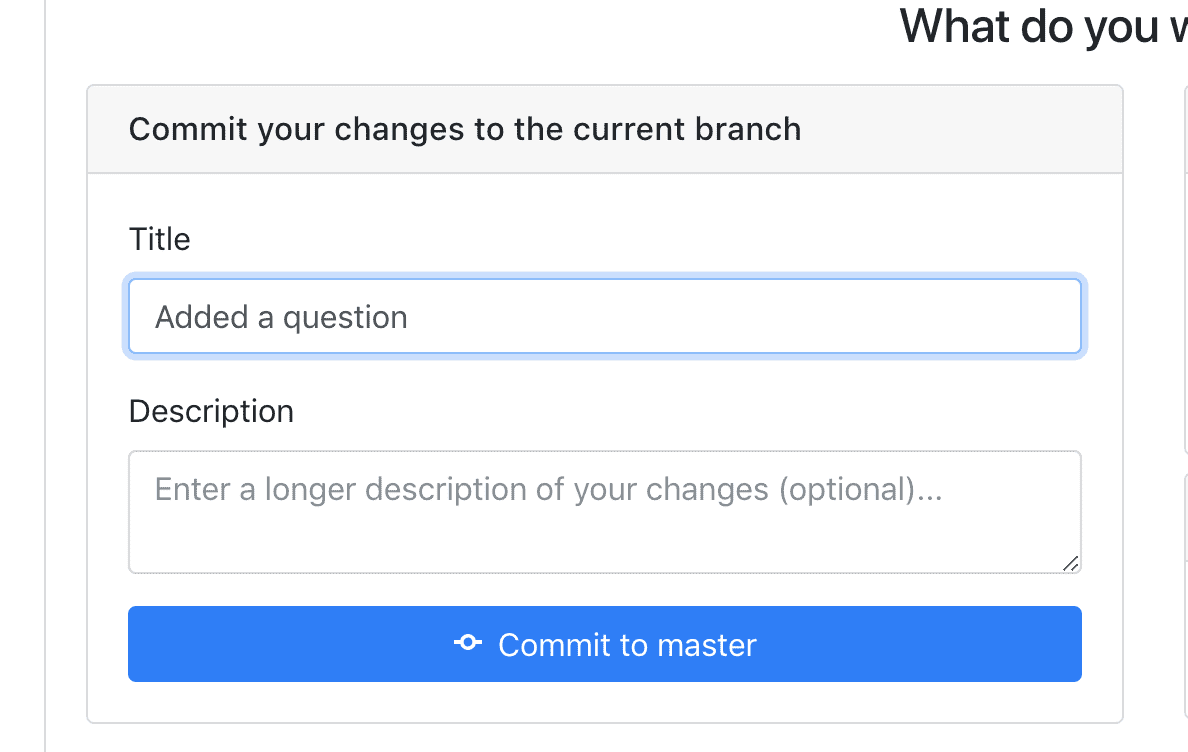
To commit, enter a title for the snapshot (required), and, optionally, a longer description:
After you commit, you will no longer have any pending changes:
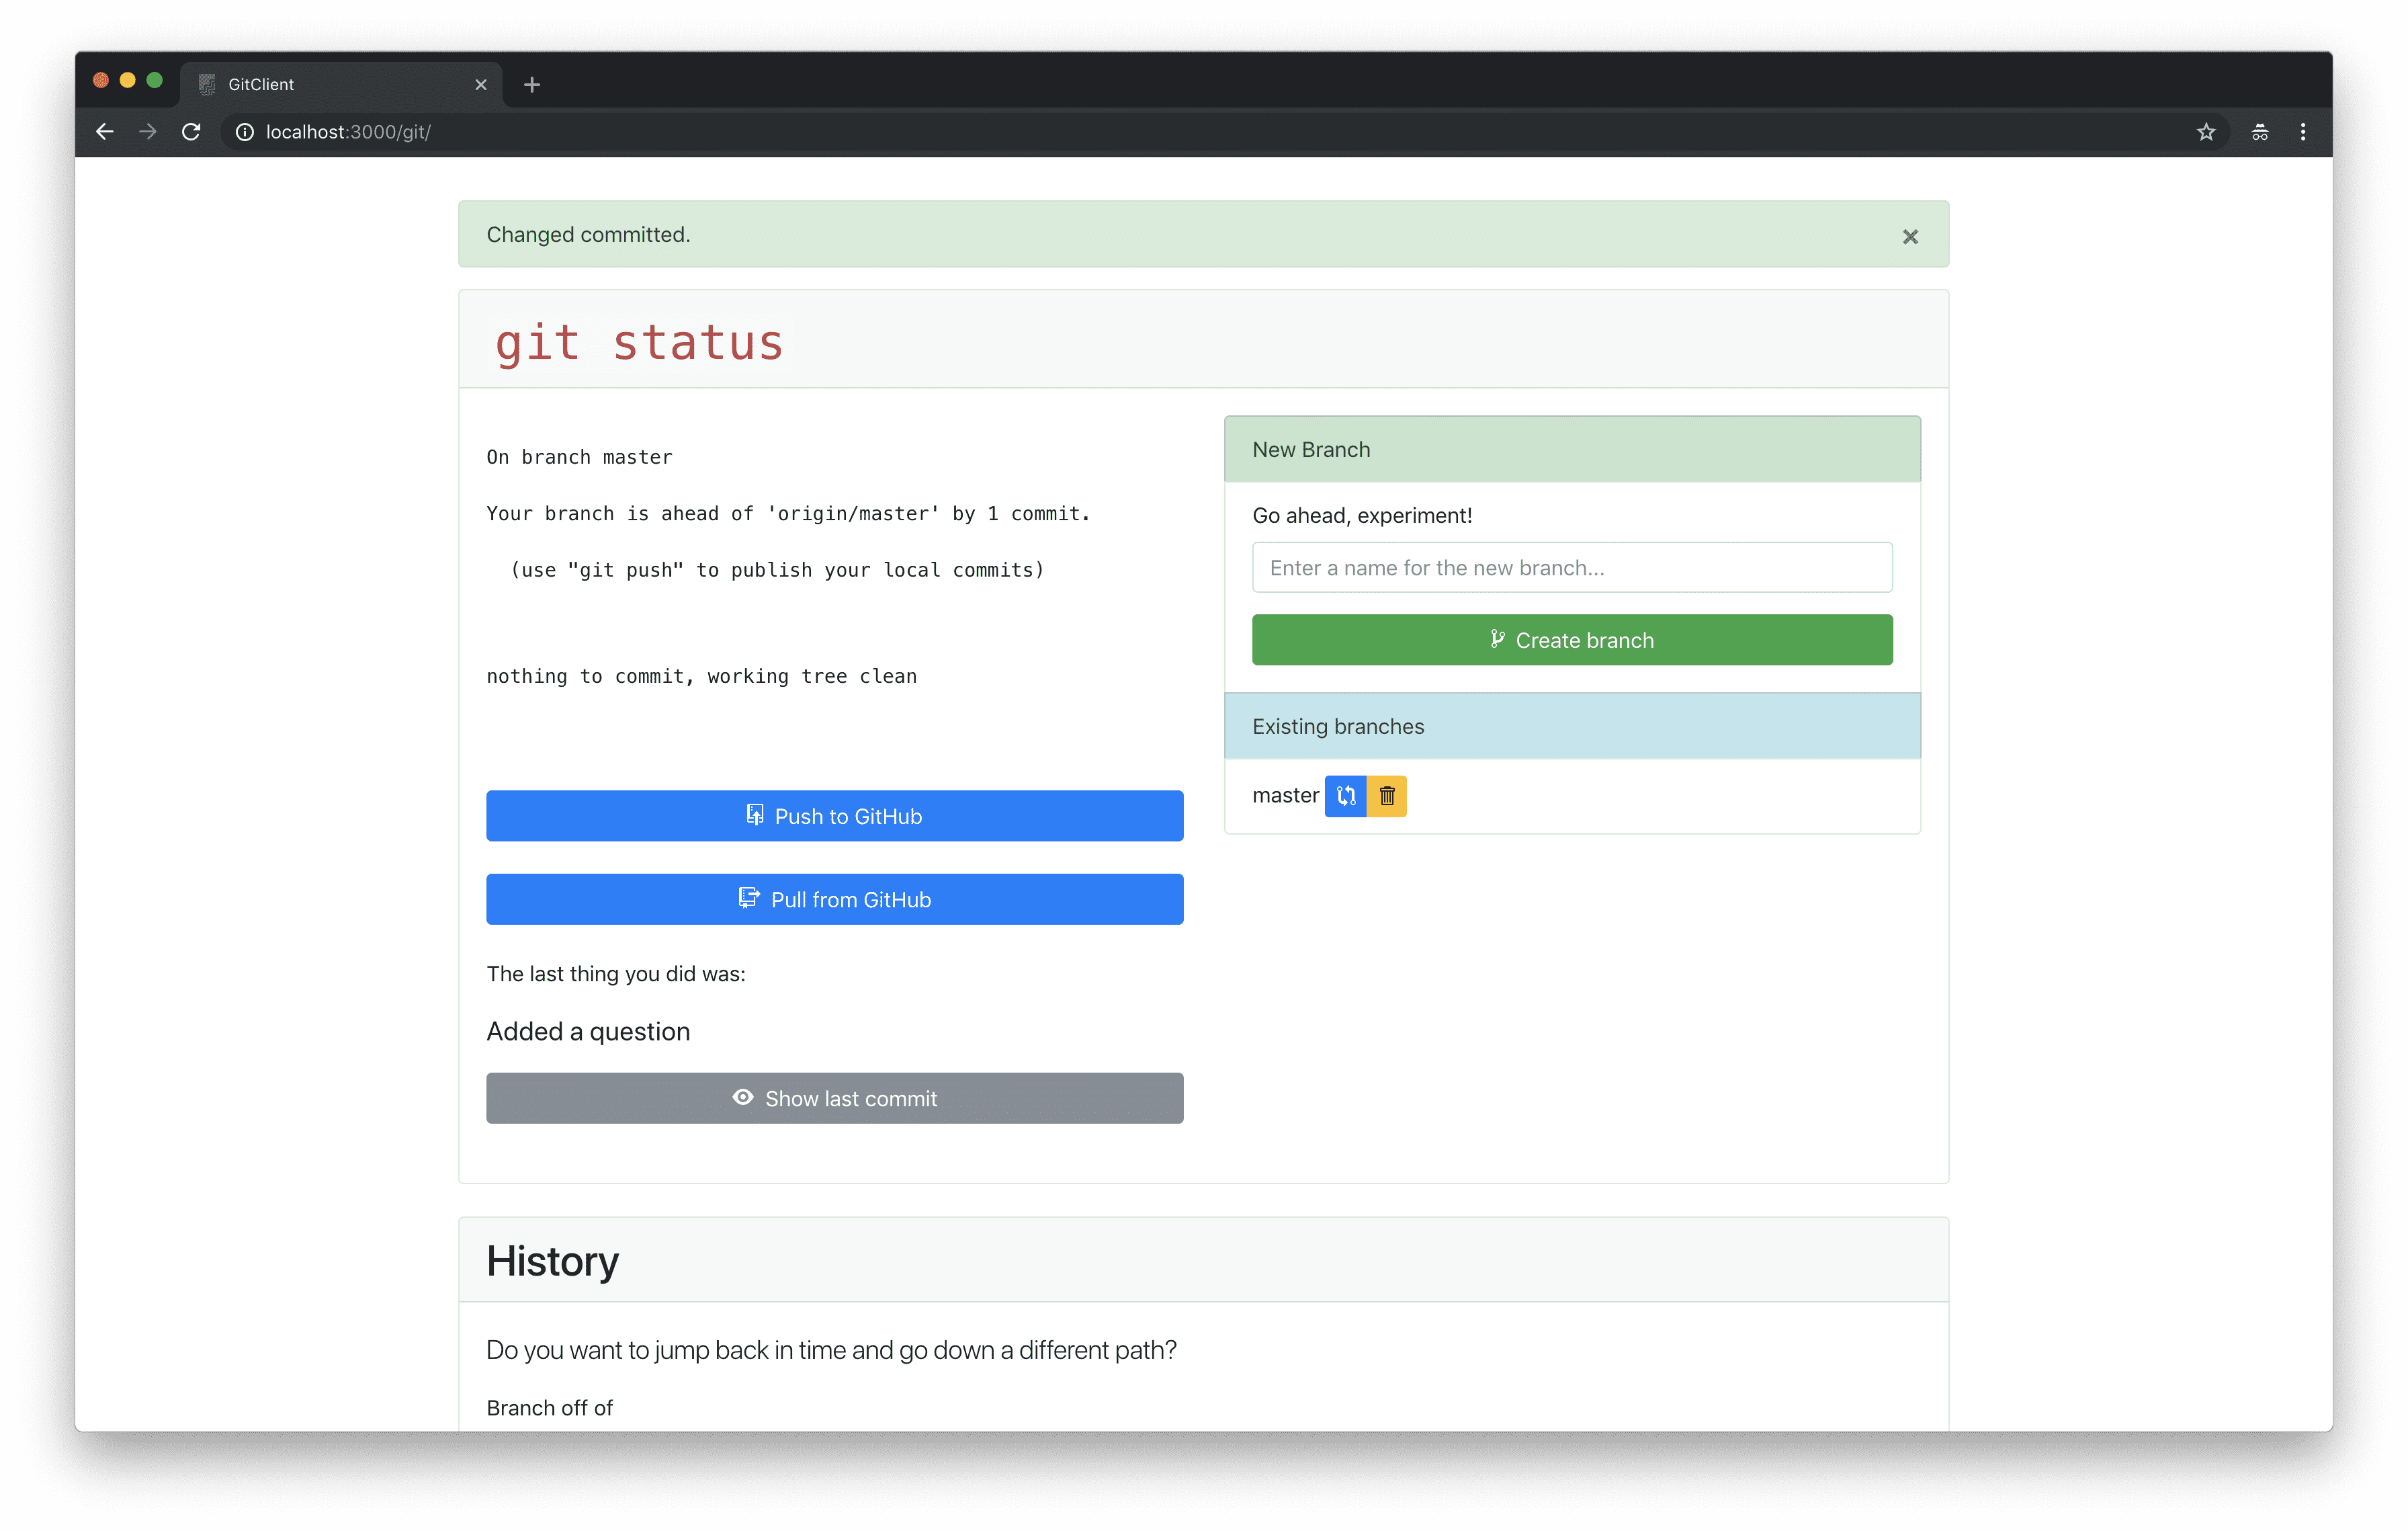
If you edit your code again, then you can make further commits.
Fundamentally, that’s all you need to worry about: just make lots of commits as you work.
The best time to commit is right after you just got something to work, before you start on your next experiment.
Remember: ABC: Always Be Committing.
Jumping back in time
In the History dialog at the bottom, you can see a list of all of the commits you’ve made. If you want to jump back in time to one of them, copy the 7 letter code (known as the “hash” of the commit; it is a unique identifier) in front of it into the “Branch off of” field above. Pick a name for a new version, and click “Create a new branch off of…”.
It will snap all of the files in the project back to that point in time, and you can now make further commits along a new path — while still retaining all of your old commits on the old path.
You can easily jump to any commit from any branch at any time — so feel free to experiment! Make a commit to save your current work, then jump back to a previous commit to try a different approach.
Switch to a Different Branch
Have you gone back in time and decided your first attempt was better? Turn your attention to the “Existing Branches” panel on the right. This will list any branches your project has— master is the default starting branch. To switch to a different branch, click the blue double arrow button next to the name of the branch you want to switch to.
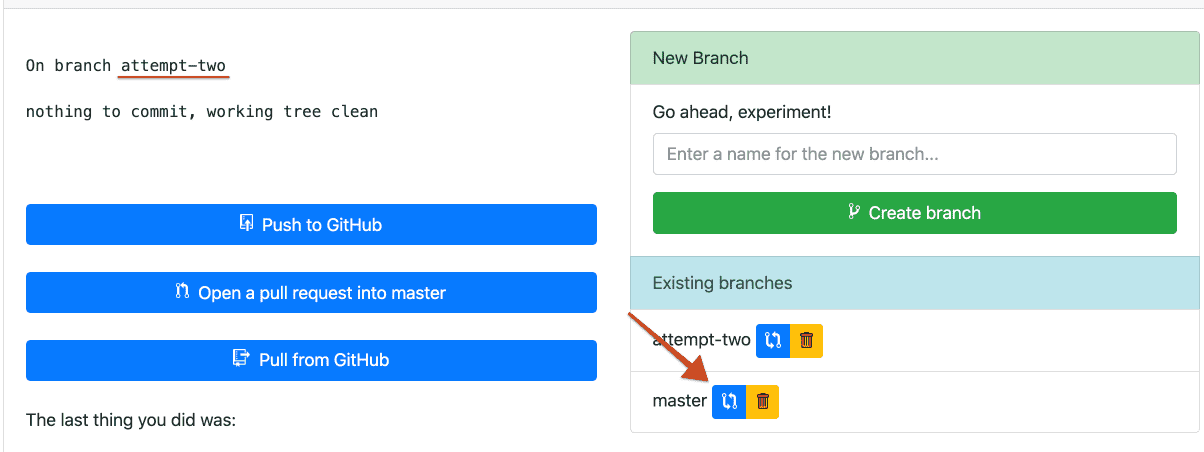
If you’re ever unsure of what branch you’re on, the top of the page should list “On branch ___”.
Push to GitHub
Gitpod workspaces are not permanent. Even if we make git commits, if the workspace is deleted so is all of our work! This is where GitHub comes in. We can push all of the commits we’ve made to our repository on GitHub where it will live forever. If our Gitpod workspace gets destroyed we can just re-create another one from the latest commit on GitHub!
Before you can push to GitHub, you need to give Gitpod access. Head over to the Integrations under your account settings in Gitpod and make sure you check “public repos” and click “Update”.
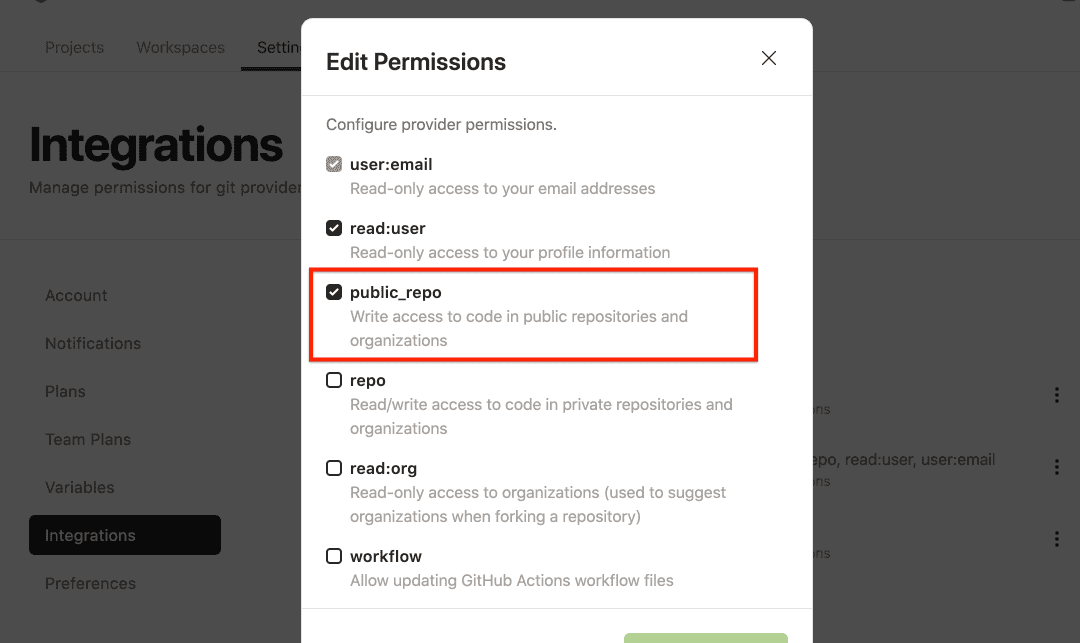
This should open a GitHub authorization dialogue.
Make sure to click “Grant” next to the GitHub organization you created for class

Now you should be all set to push your commits to GitHub!